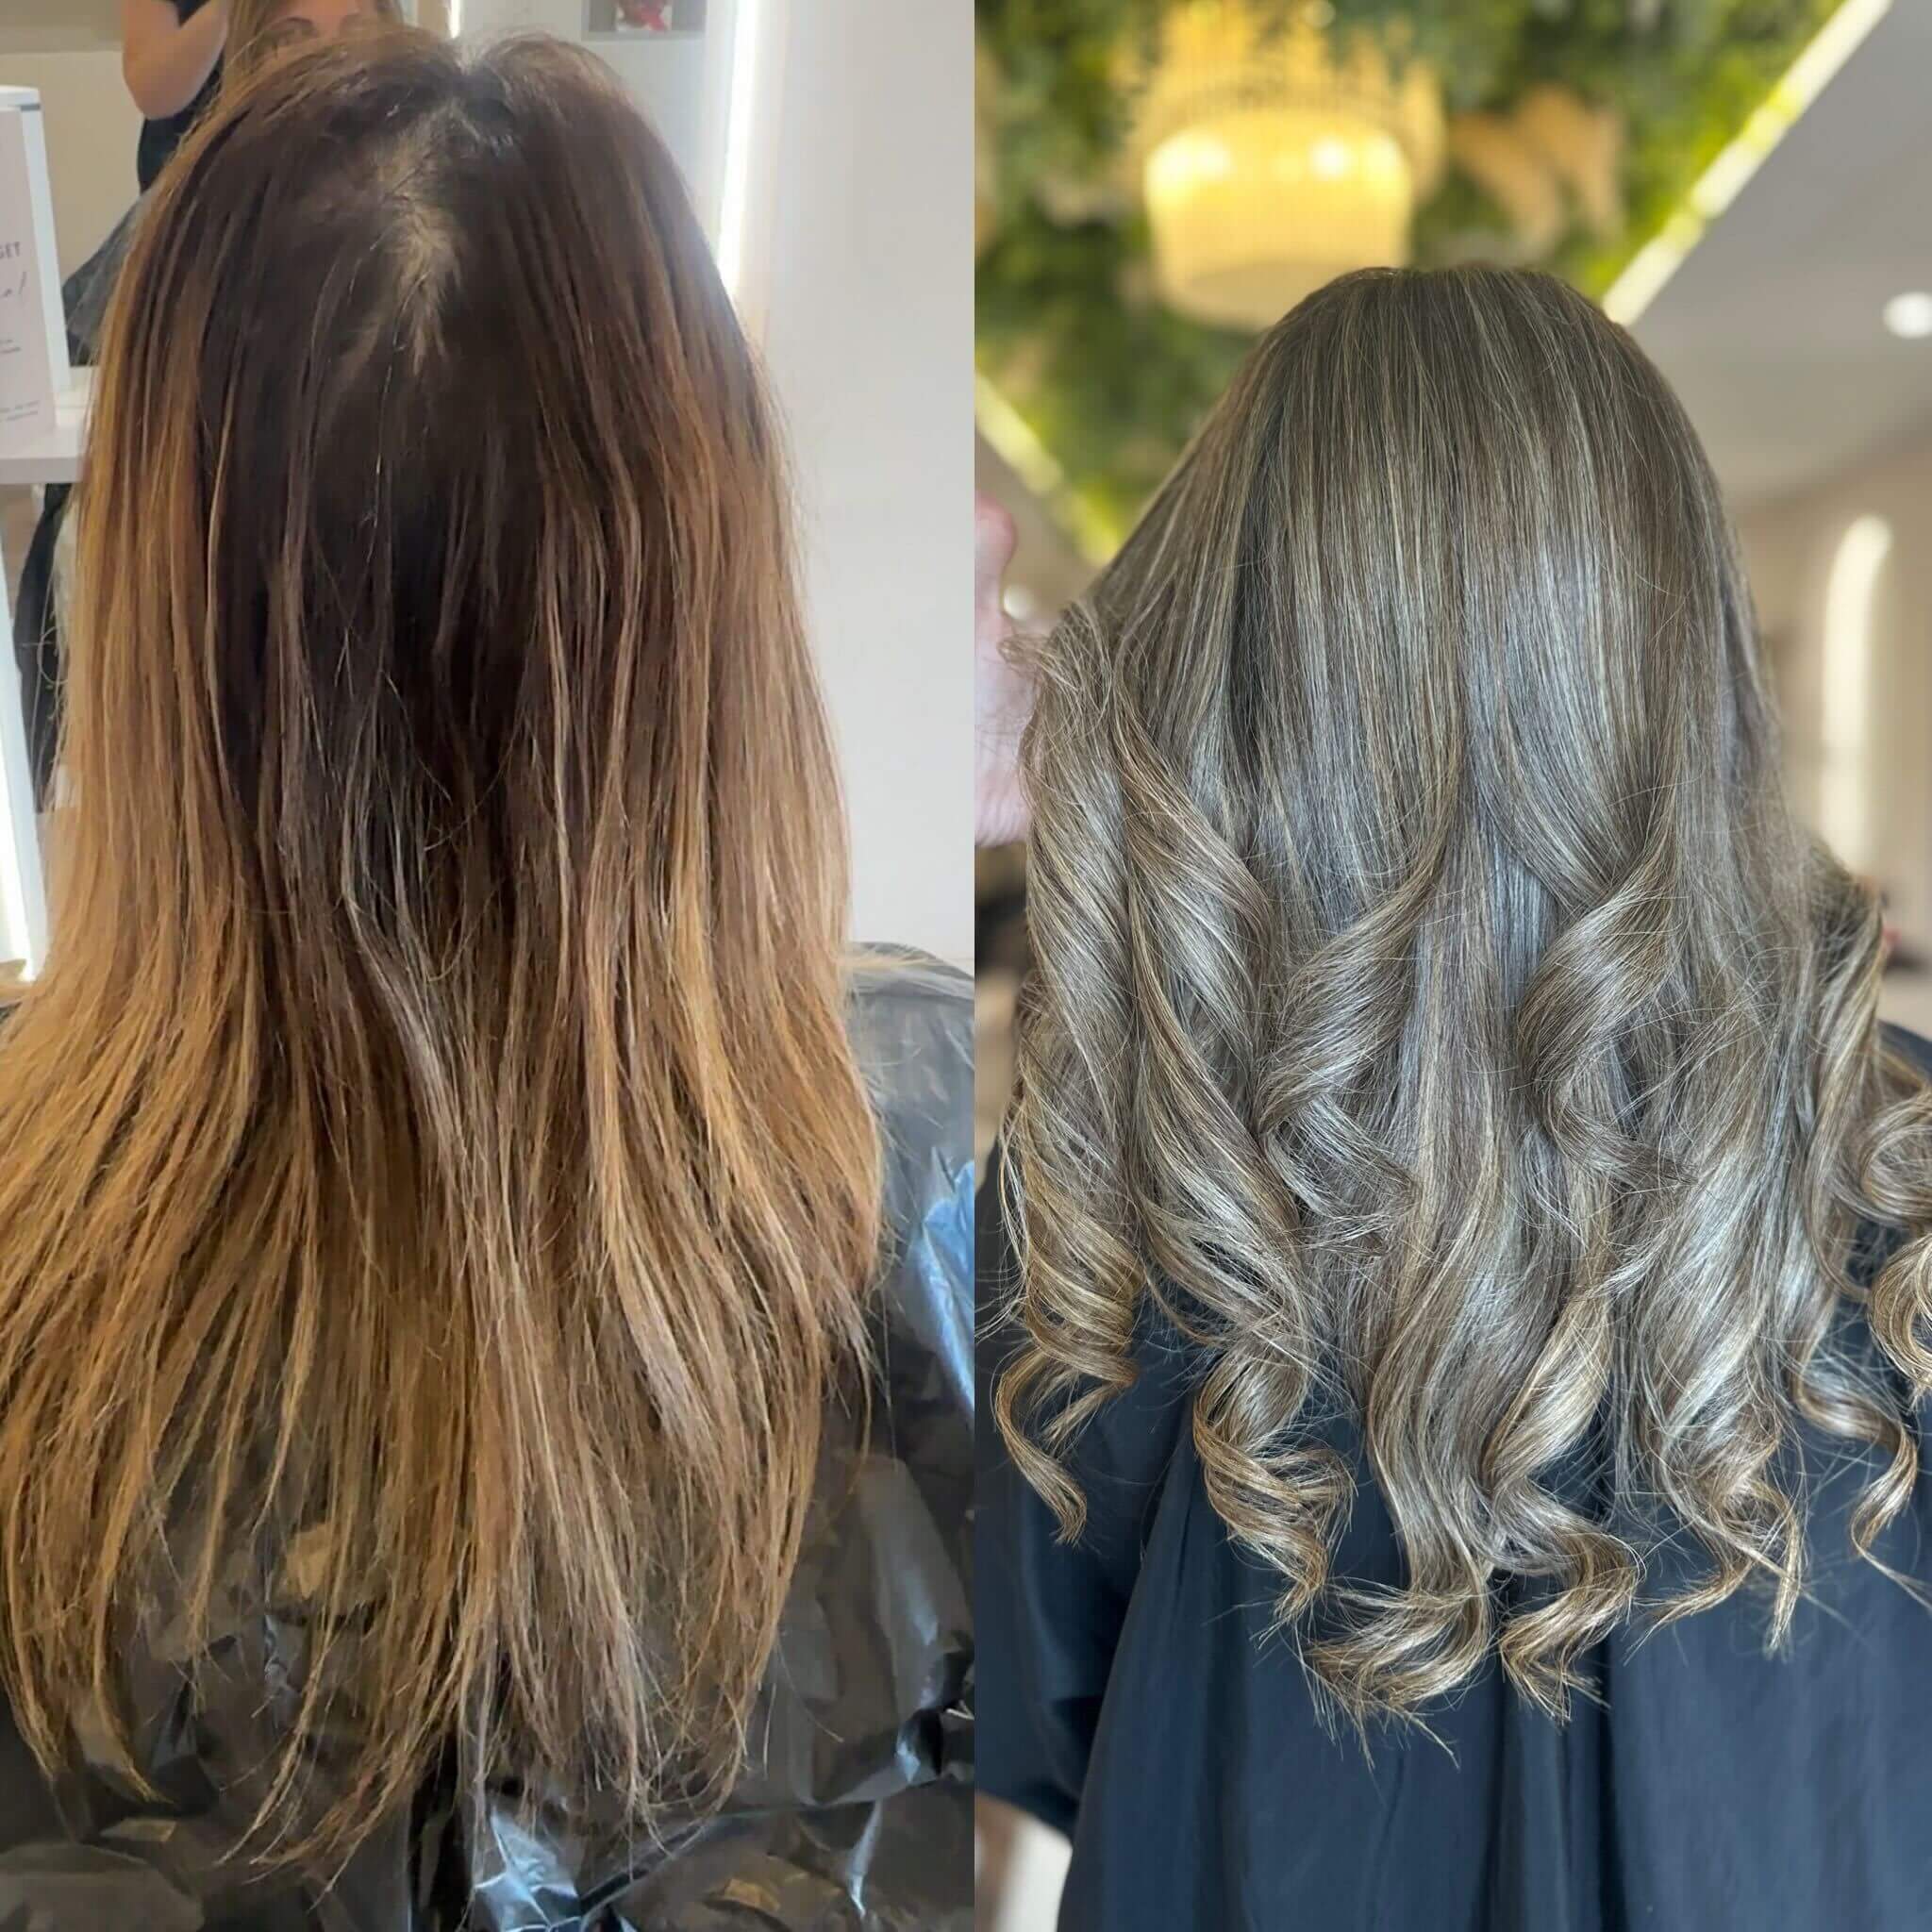
Creating Balayage with Tape Extensions
You can do many wonderful things with tape extensions, and so it’s no wonder they’re so hugely popular in UK salons. From adding colour and dimension to length and thickness, tapes are the safest and most versatile hair extension method for virtually any client.
But did you know that you can also create a chemical-free balayage effect with tapes? If you have a mystical, virgin-haired client in desperate want of some lightness and brightness, don’t go near that tub of lightener - use tape extensions instead!
In this article, we will cover what items you need to create a balayage effect with tapes, different techniques you can use to create the look and our top tips to help it all blend seamlessly together - all from the knowledge bank of our North Professional Hair co-founder and lead-educator, Charlotte Quinn.
Continue on and become the next bleach-free balayage expert in your area!
How to create a balayage effect with tape extensions
We know of three different, tried and tested, techniques for you to create a bleach-free balayage effect using tape extensions. Read along to find the best one for you…
Technique 1
One common technique for creating a balayage effect with tape extensions is to block the light and dark colours around the head, whilst using your usual installation pattern.
When installing the tape extensions, you need to strategically place the lighter tapes in areas where you would lighten the hair during the balayage process. Then, in the areas of your installation pattern with no tapes, you install the darker tape extensions.
Make sure to focus on creating natural-looking dimensions throughout the hair, with an emphasis on creating lighter lengths and rooted shadows.
This technique is great for beginner tape specialists, as it gives you wider control over the placement of the dimension you are adding to your client’s hair. The downside, however, is that the result could end up looking blocky or streaky if the balance is not quite right.
Technique 2
A more advanced technique to create a balayage effect using tape extensions is to layer your light and dark tapes on top of each other, when securing onto the natural hair.
To do this, you need to blend the two different shades together, by installing the lighter tape extension underneath your client’s natural hair and the darker tape extension on top. You may choose to alternate which extension is on top, if you want to add more light in certain areas.
By layering the two colours together, you are instantly creating natural-looking highlights and lowlights throughout your client’s hair, without running the risk of the installation looking blocky or streaky.
The downside to this technique, however, is that it may not give much of a balayage effect. If you haven’t added enough light to the length, it may just look as though you’ve added highlights into your client’s hair.
Charlotte’s technique
Our North co-founder and educator, Charlotte Quinn, uses a combination of these two techniques, along with another.
Charlotte uses the layered light and dark tape extensions around the head to create natural-looking highlights and lowlights, whilst also strategically placing lighter and darker tapes in specific areas to create the illusion of brighter lengths.
Charlotte’s own technique is to cut some tape extensions in half, so that she can add lighter tapes around her client’s hairline for natural-looking face framing. She also cuts some tapes in half so that she can fill smaller areas which may need additional thickness or dimension.
What you need to create a balayage effect with tape extensions
To create a balayage effect with tape extensions, you need the same five key items as you would for any tape extension service; the extensions, scissors, sectioning clips, professional pliers and a comb.
However, you’ll need to keep reading to find out exactly why you need them for this service…
Tape extensions
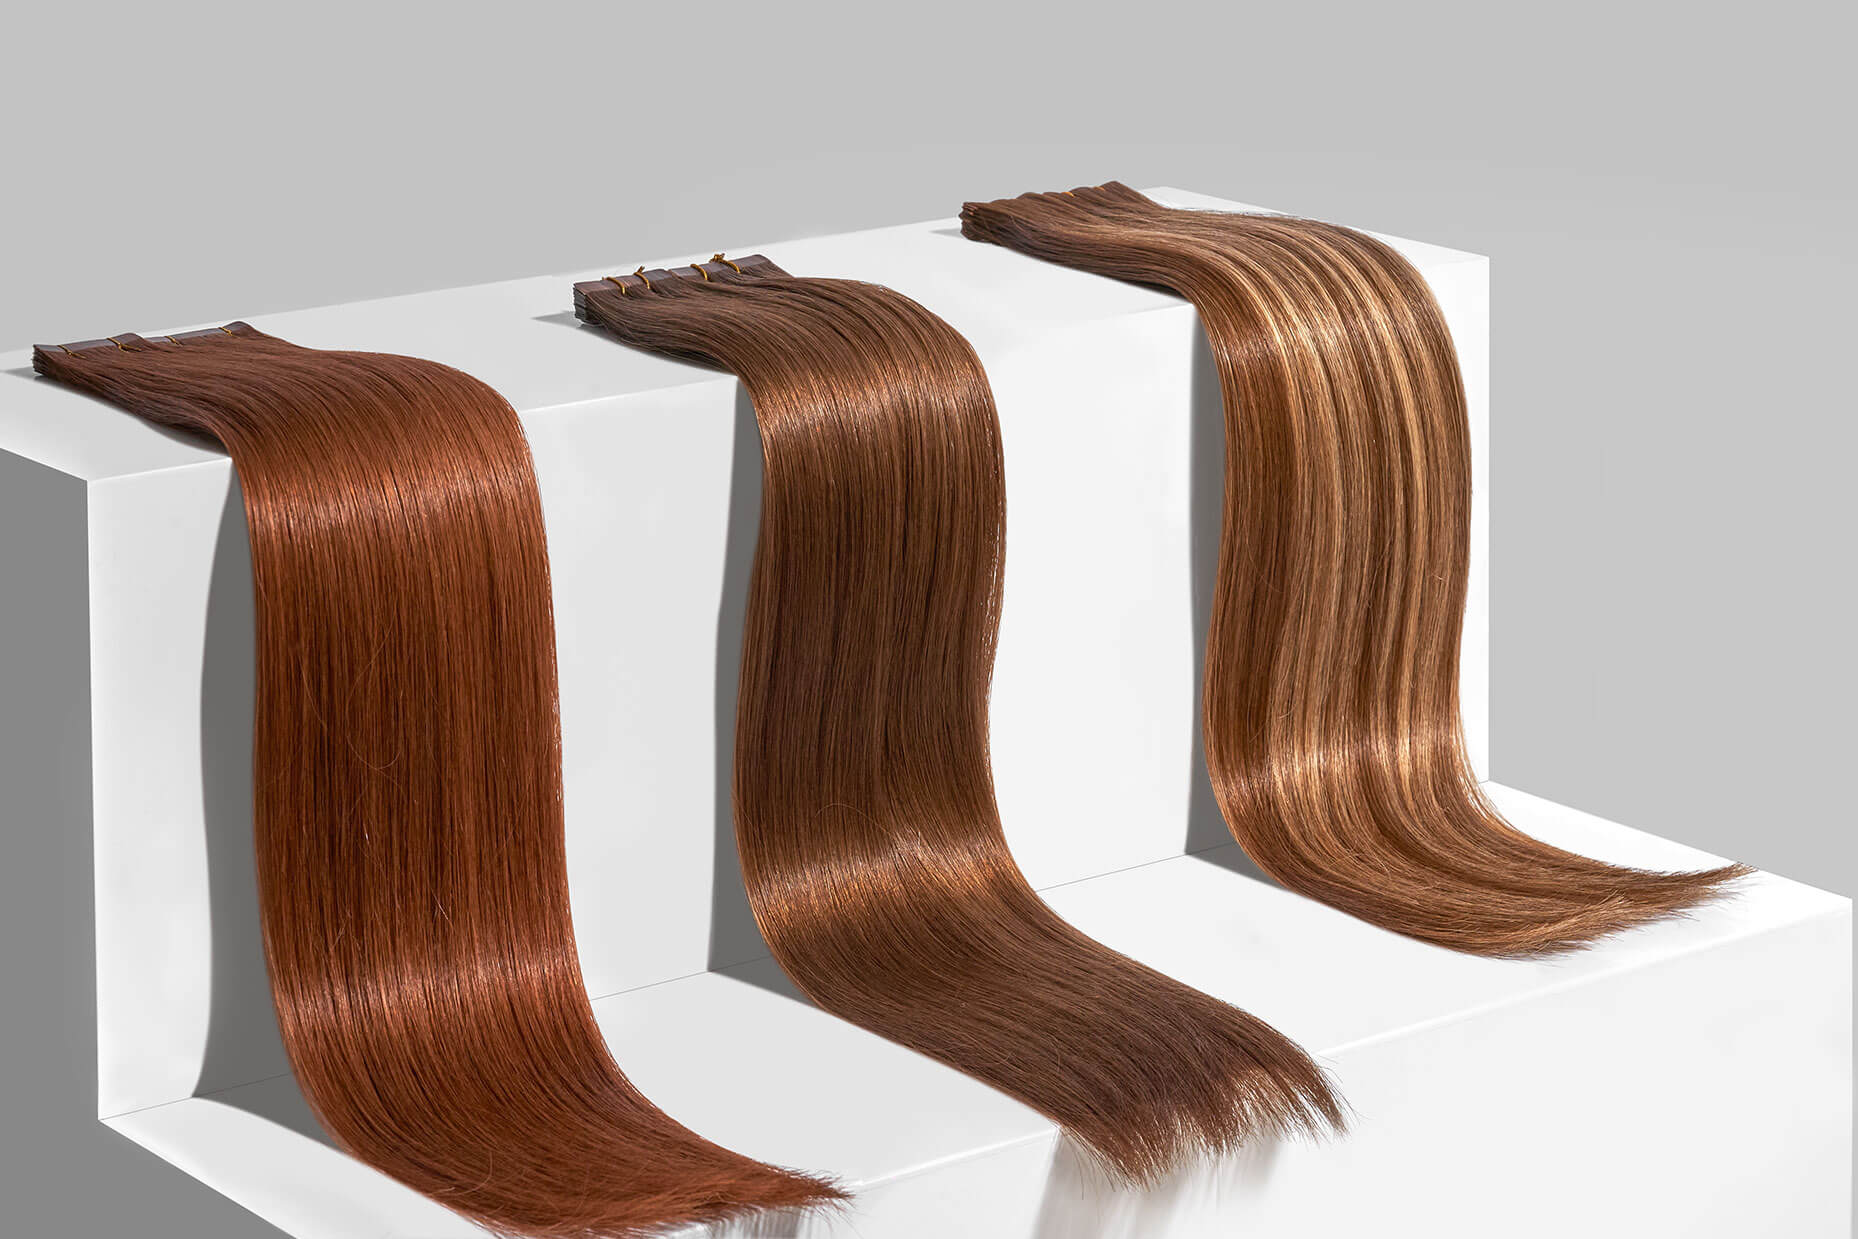
Choosing the right colour tape extensions is crucial to creating a balayage effect on your client’s hair. You will need two different colours of tapes - one lighter colour and one darker colour.
The darker colour needs to be the same colour as your client’s natural hair, whereas the lighter colour needs to be a brighter shade of the dark, both in the same tone (e.g. warm or cool/ashy).
For your lighter colour, we recommend using North Invisible Root Glaze Tapes. The darker, lived-in root will help you blend the lighter shade into your client’s hair, will make the installation look more natural and will help you match which colours/tones of tapes to use.
Scissors
Scissors are always needed during any tape extension service; to trim and blend the extensions into your client’s natural hair. However, you can also use a pair of old scissors, where needed, to cut your extensions in half, giving yourself the ability to create smaller tapes.
Sectioning clips
Sectioning clips are essential to almost any service you do. During this service, sectioning clips will help you map out your installation pattern and keep unwanted hair out of the way whilst you work your magic.
Professional pliers
Your professional pliers should be glued to you during any tape extension service, as these are needed to secure the tapes once they have been installed onto the client’s natural hair. They are especially needed if you use smaller tapes, as these can be very finicky to secure.
Comb
Your comb, as you know, is incredibly useful for many things. During a tape extension service, you will need your comb for sectioning and trimming. However, whilst trying to create a balayage effect with tapes, running a comb through your client’s hair as you go along will help you ensure that the colours of the tapes blend together seamlessly.
Top tips to create a seamless balayage effect with tape extensions
Here are our top tips for creating a seamless balayage effect with tape extensions:
- Make sure to match the tone of the colours
- Use North Invisible Root Glaze tape extensions for the lighter shade to help blend the light and dark colours into each other
- Cut some tape extensions in half to create smaller pieces, for face framing or to fill in small areas
- Layer light and dark tape extensions on top of each other, for natural highlights and lowlights
- Strategically add blocks of lighter or darker tapes where needed
- Comb through the hair as you install, checking that the colours blend and look natural
Get ready to blend!
You came to this article looking to learn how to create a bleach-free balayage with tape extensions. Since reading, you have learnt about all the tools and techniques you can use to do so, along with our North top tips to keep everything blending together smoothly.
But what now?
At North Professional Hair, we’re dedicated to your development and growth as a tape extension specialist. We write articles just like this one, to help support your growth and knowledge, as well as teaching you the latest techniques, tips and tricks to use in your services.
Learn more with North
Check out the North Blog for more educational content, just like this one. If you found this article helpful, you may also like our other one on ‘Cutting & Blending Extensions’.
Are you constantly looking to educate yourself more and stay on top of the trends? Then why not join us on one of our North training days? Whether you’re fresh out of college or have been styling since the Stone Age, North training days have the most current advice and techniques available to you, led by leading professional North educators.